- Cobra Style Cold-Air Intake
for Forced Induction Miata in the NA-Chassis -
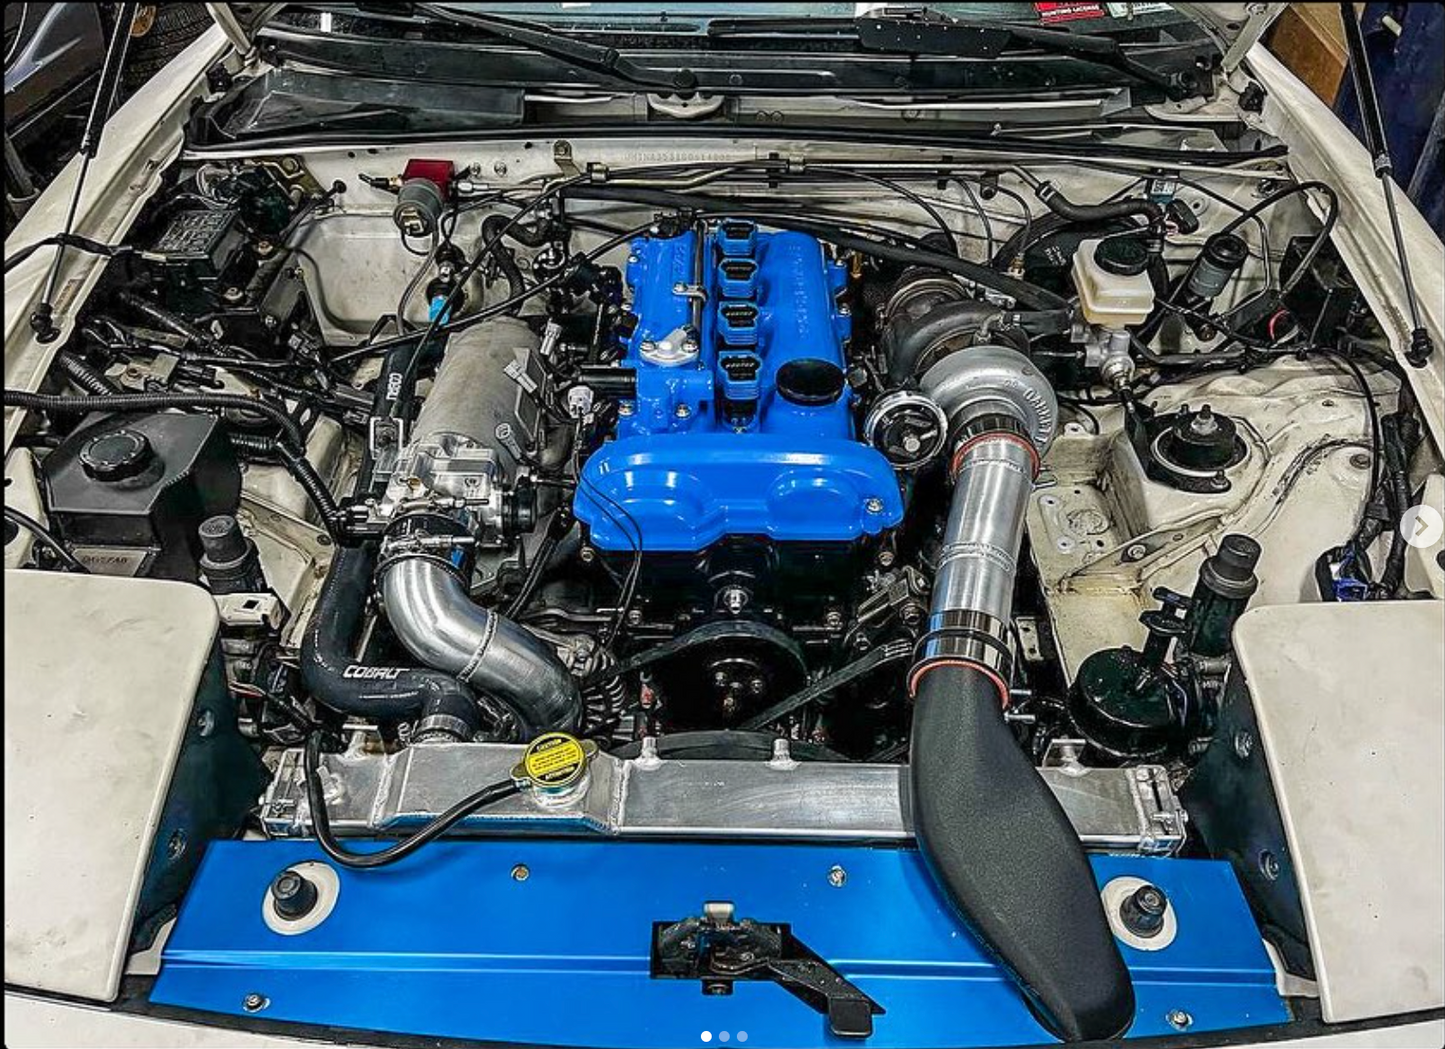
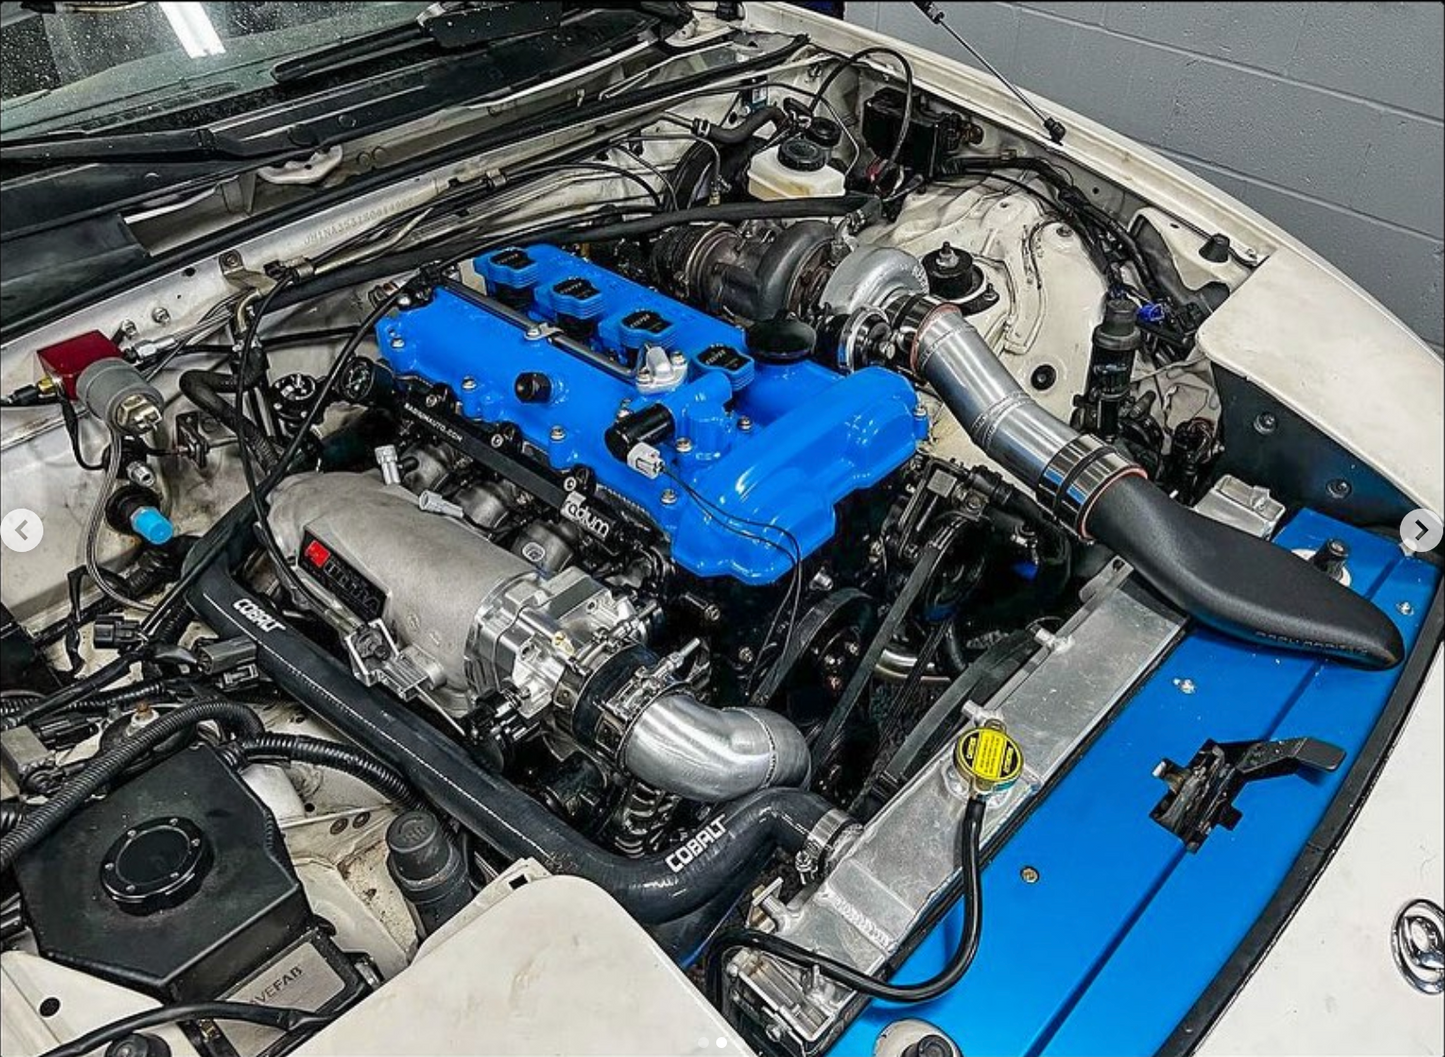
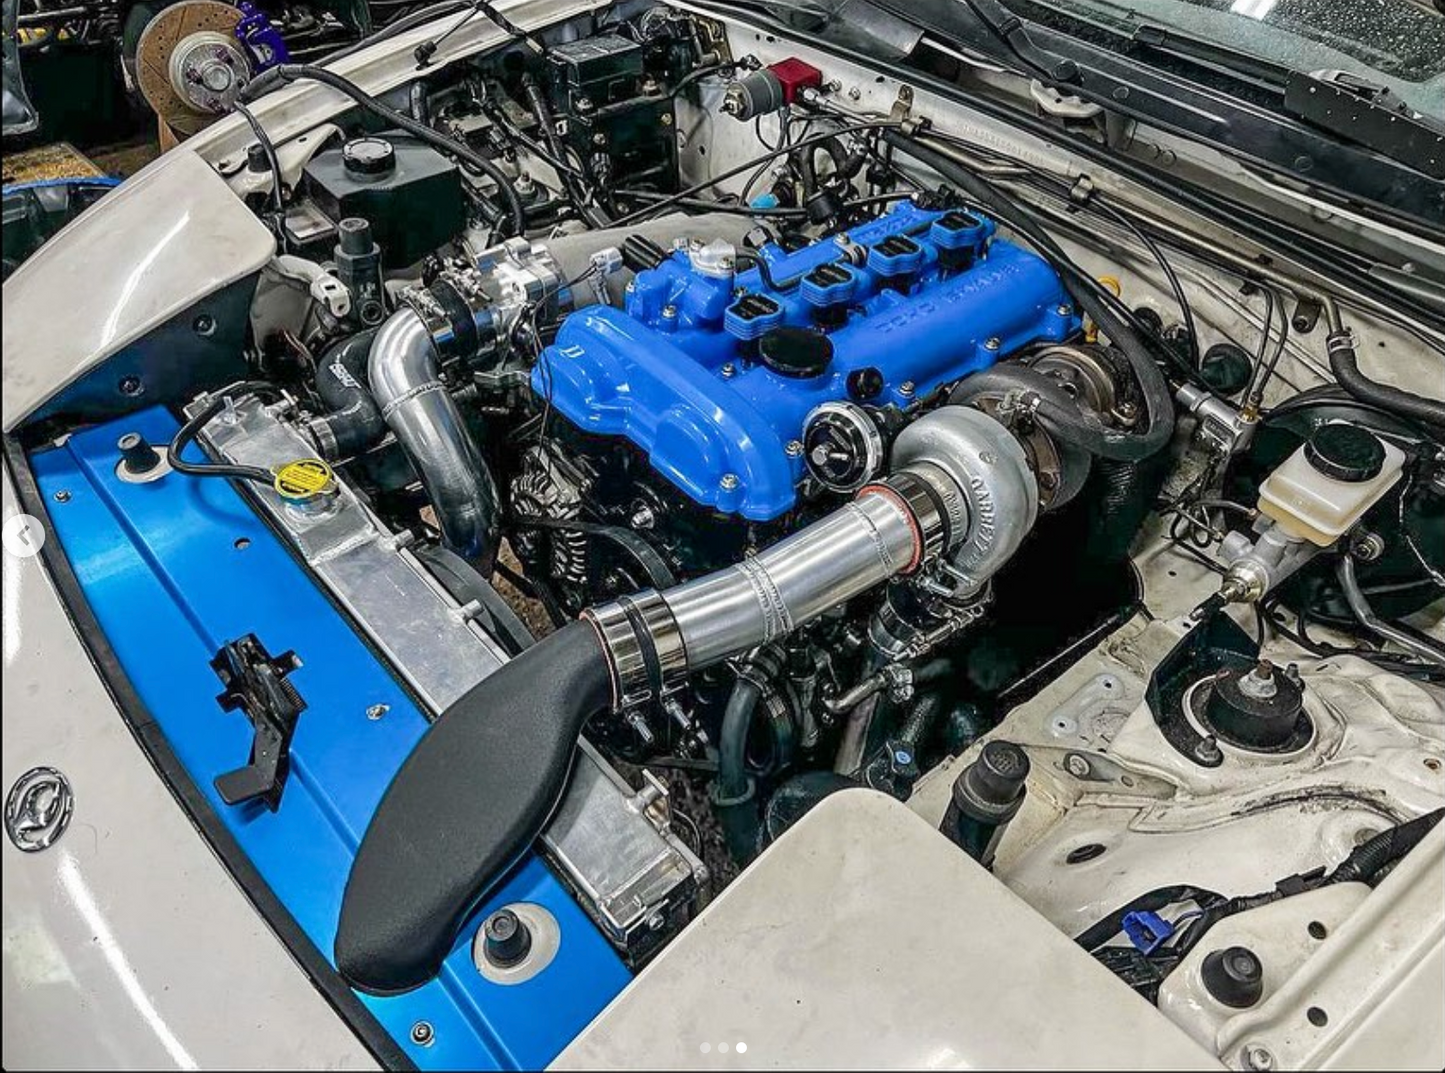
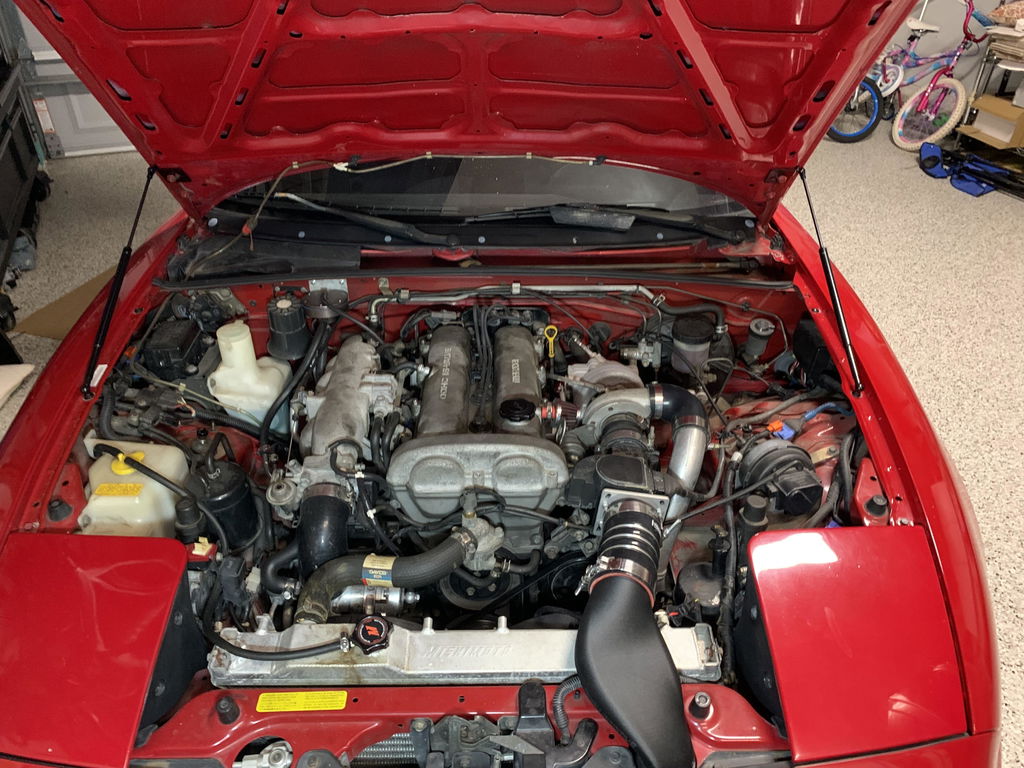
Our very famous intake pipe we make for the Non-Turbo Miata application was always special. After selling hundreds, we turned our attention to the Turbo application after numerous requests.
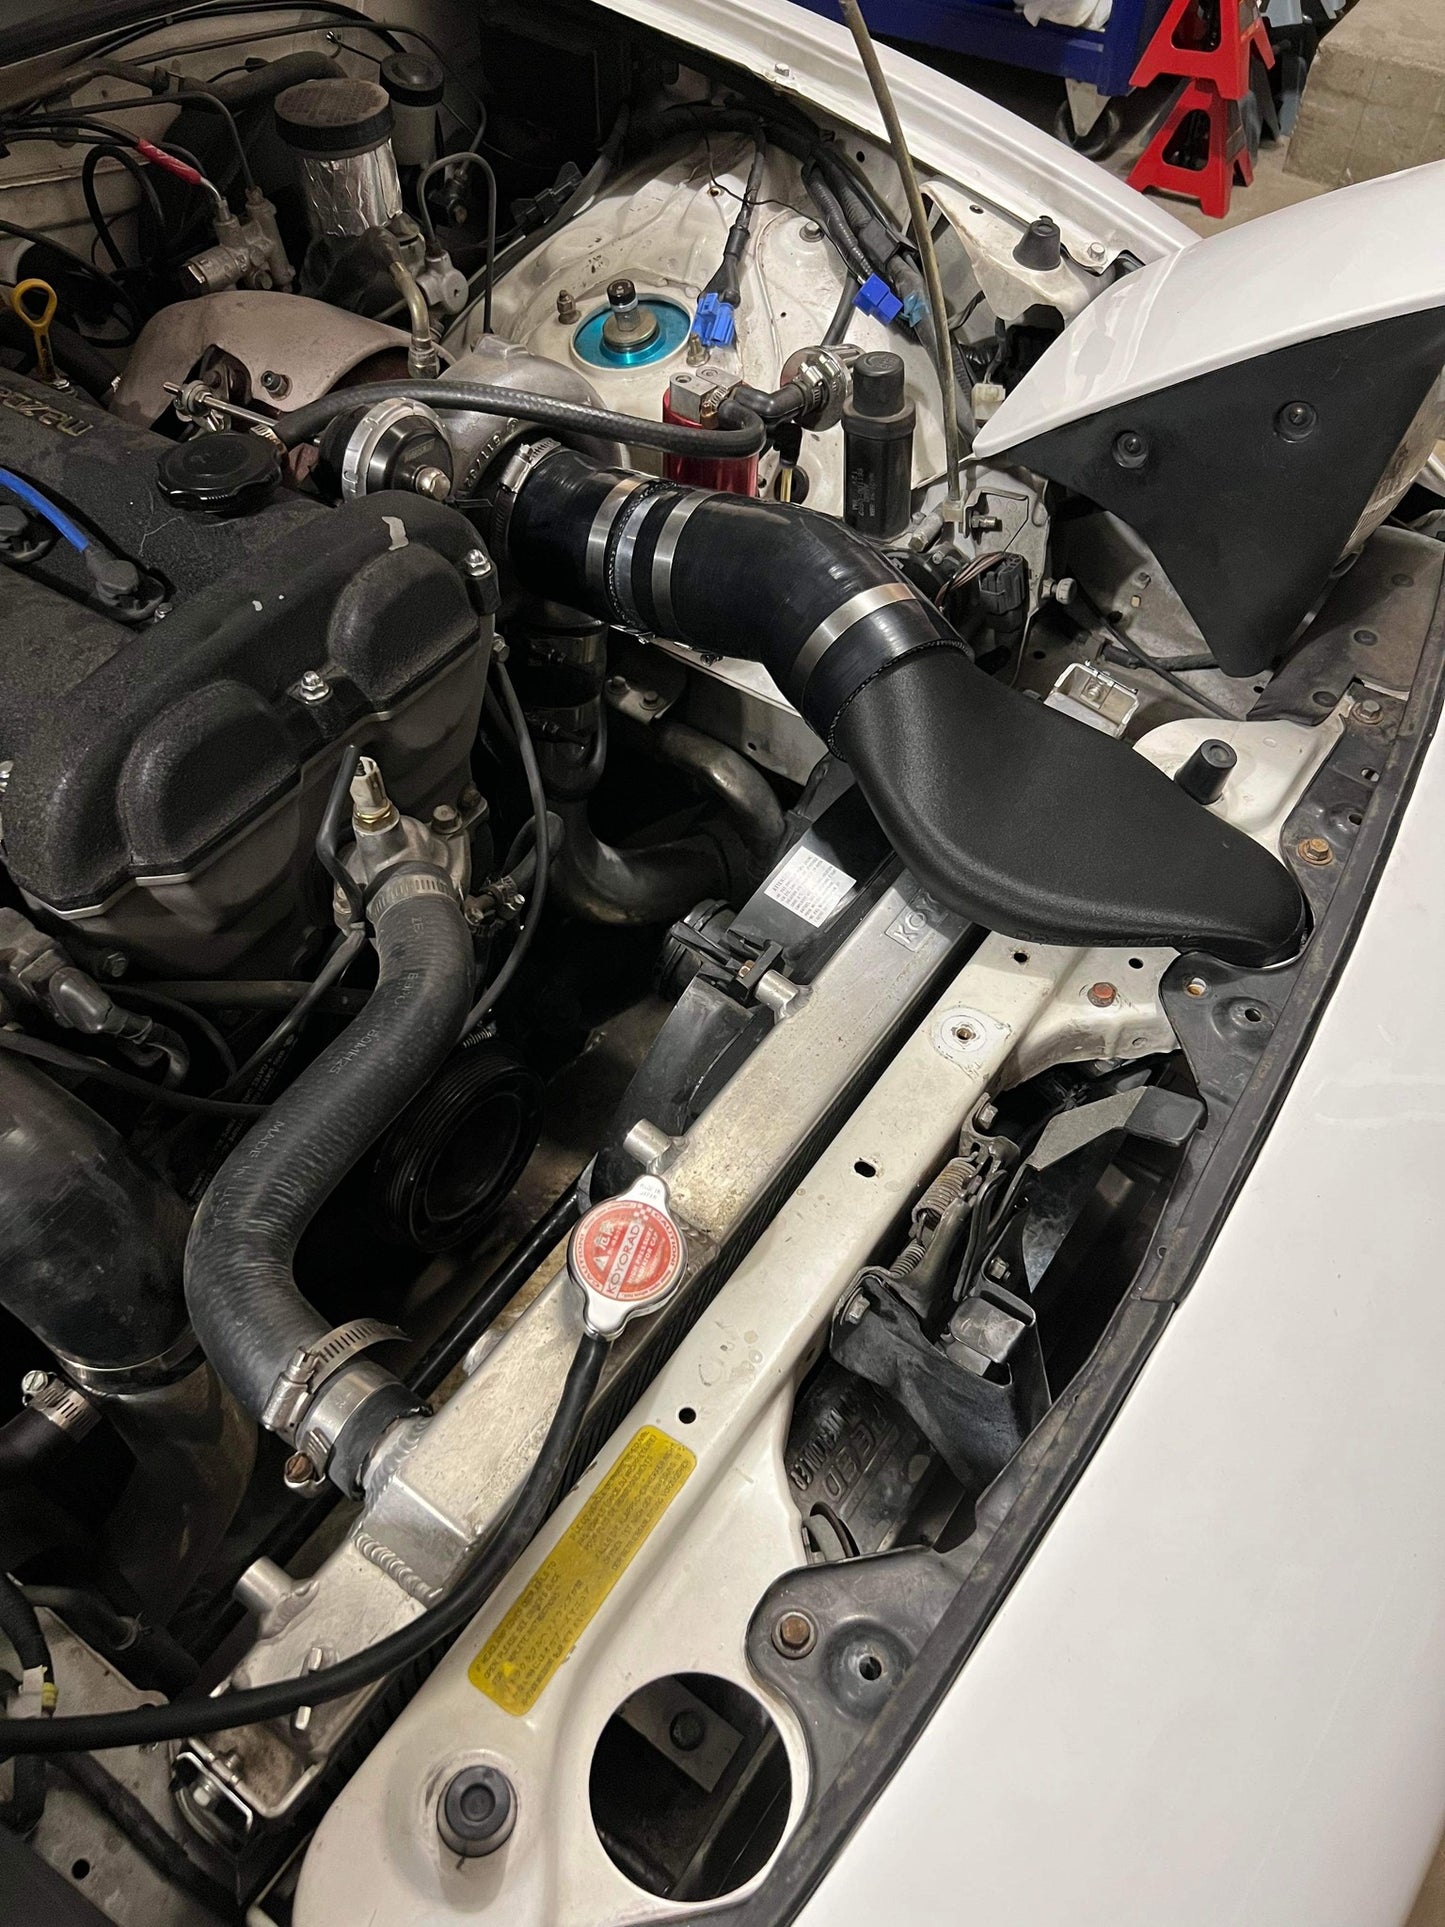
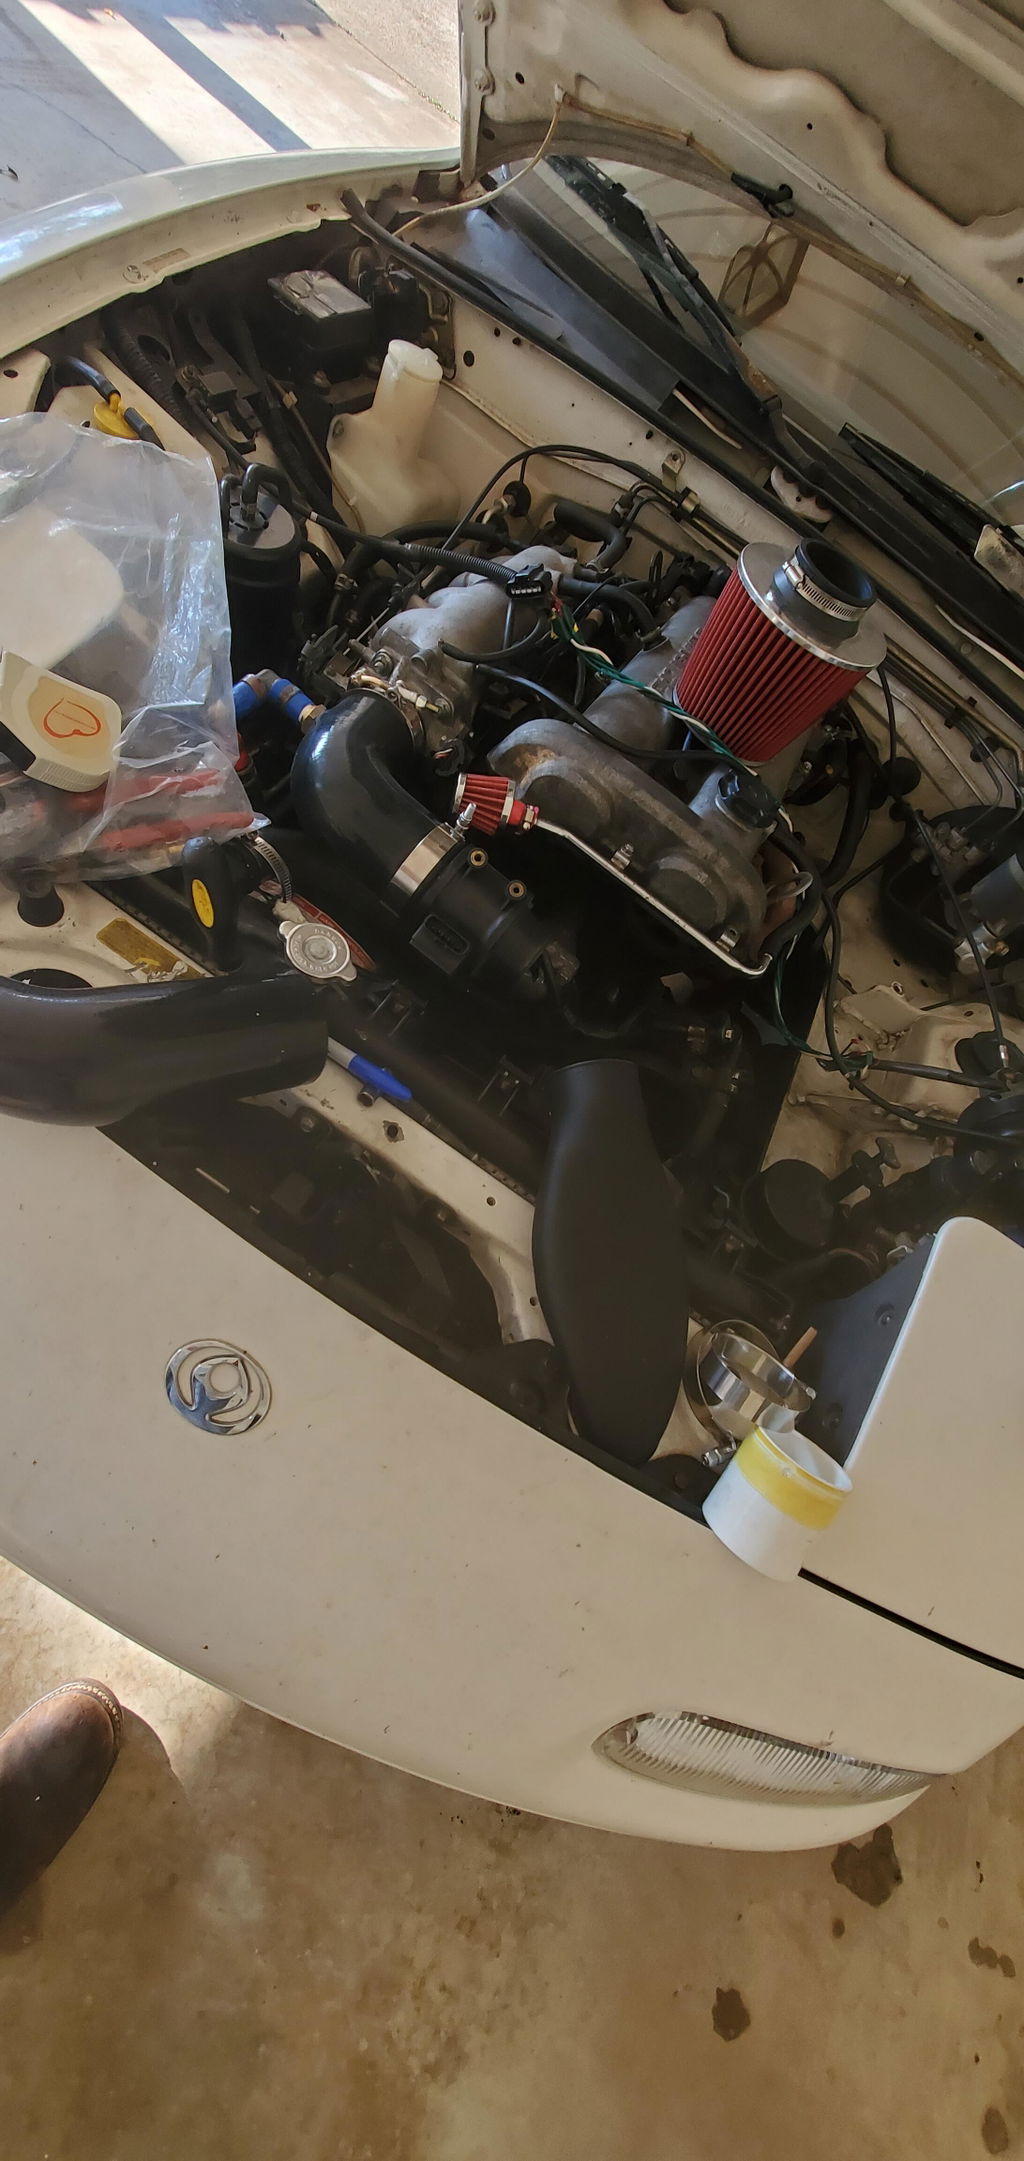
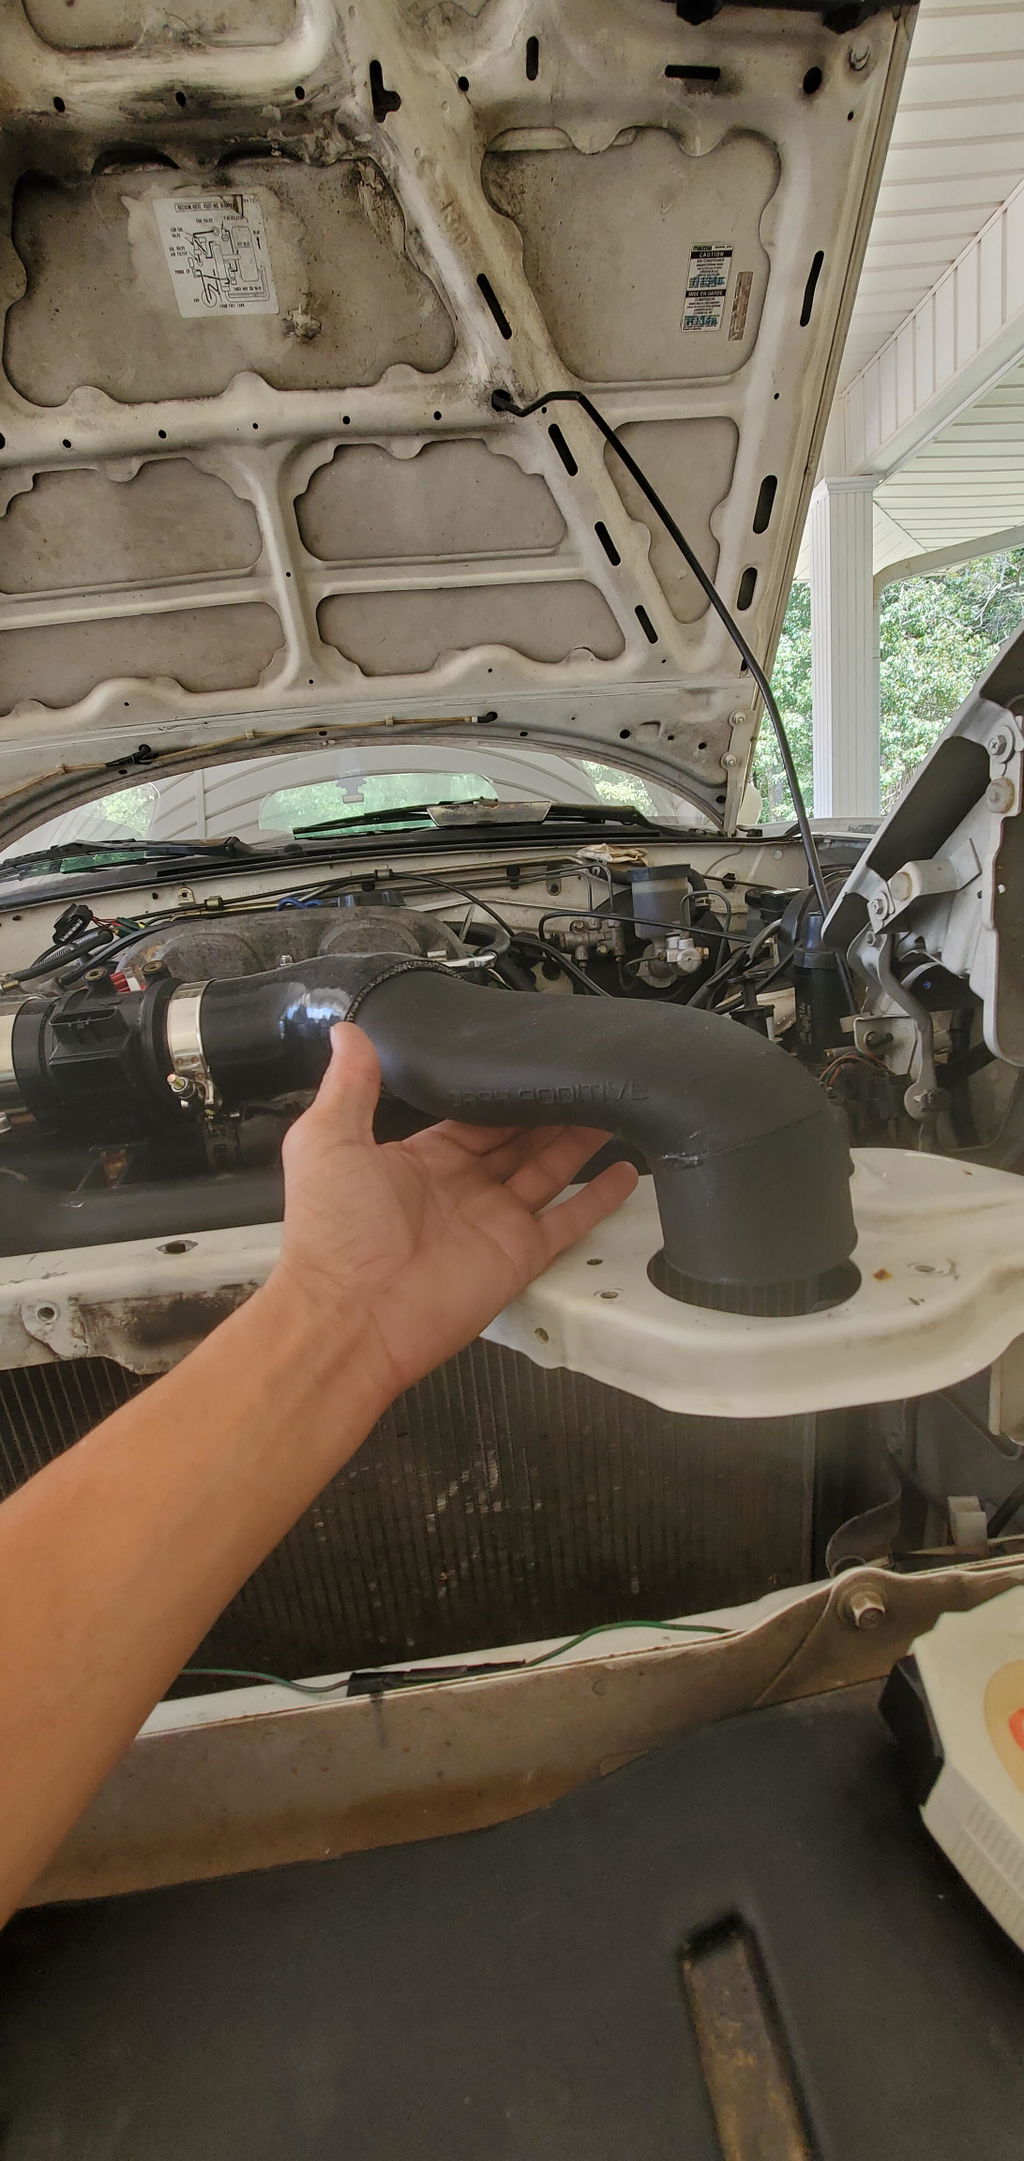
The forced induction intake pipe was designed with the same goal of bringing cold air in front of the radiator and bringing it into the engine bay but directing it to the driver side. The Miata with the NA-Chassis nomenclature has a specific hole just in front of the radiator that allows for this to happen and there is just enough room between the hood and the radiator core support that we can squeeze some air through.
For K-swapped Miatas, kindly see our other listing for K-series compatibility
We hope these intake pipes are exactly what you're looking for on your build.
Product Specifications:
---------------------------
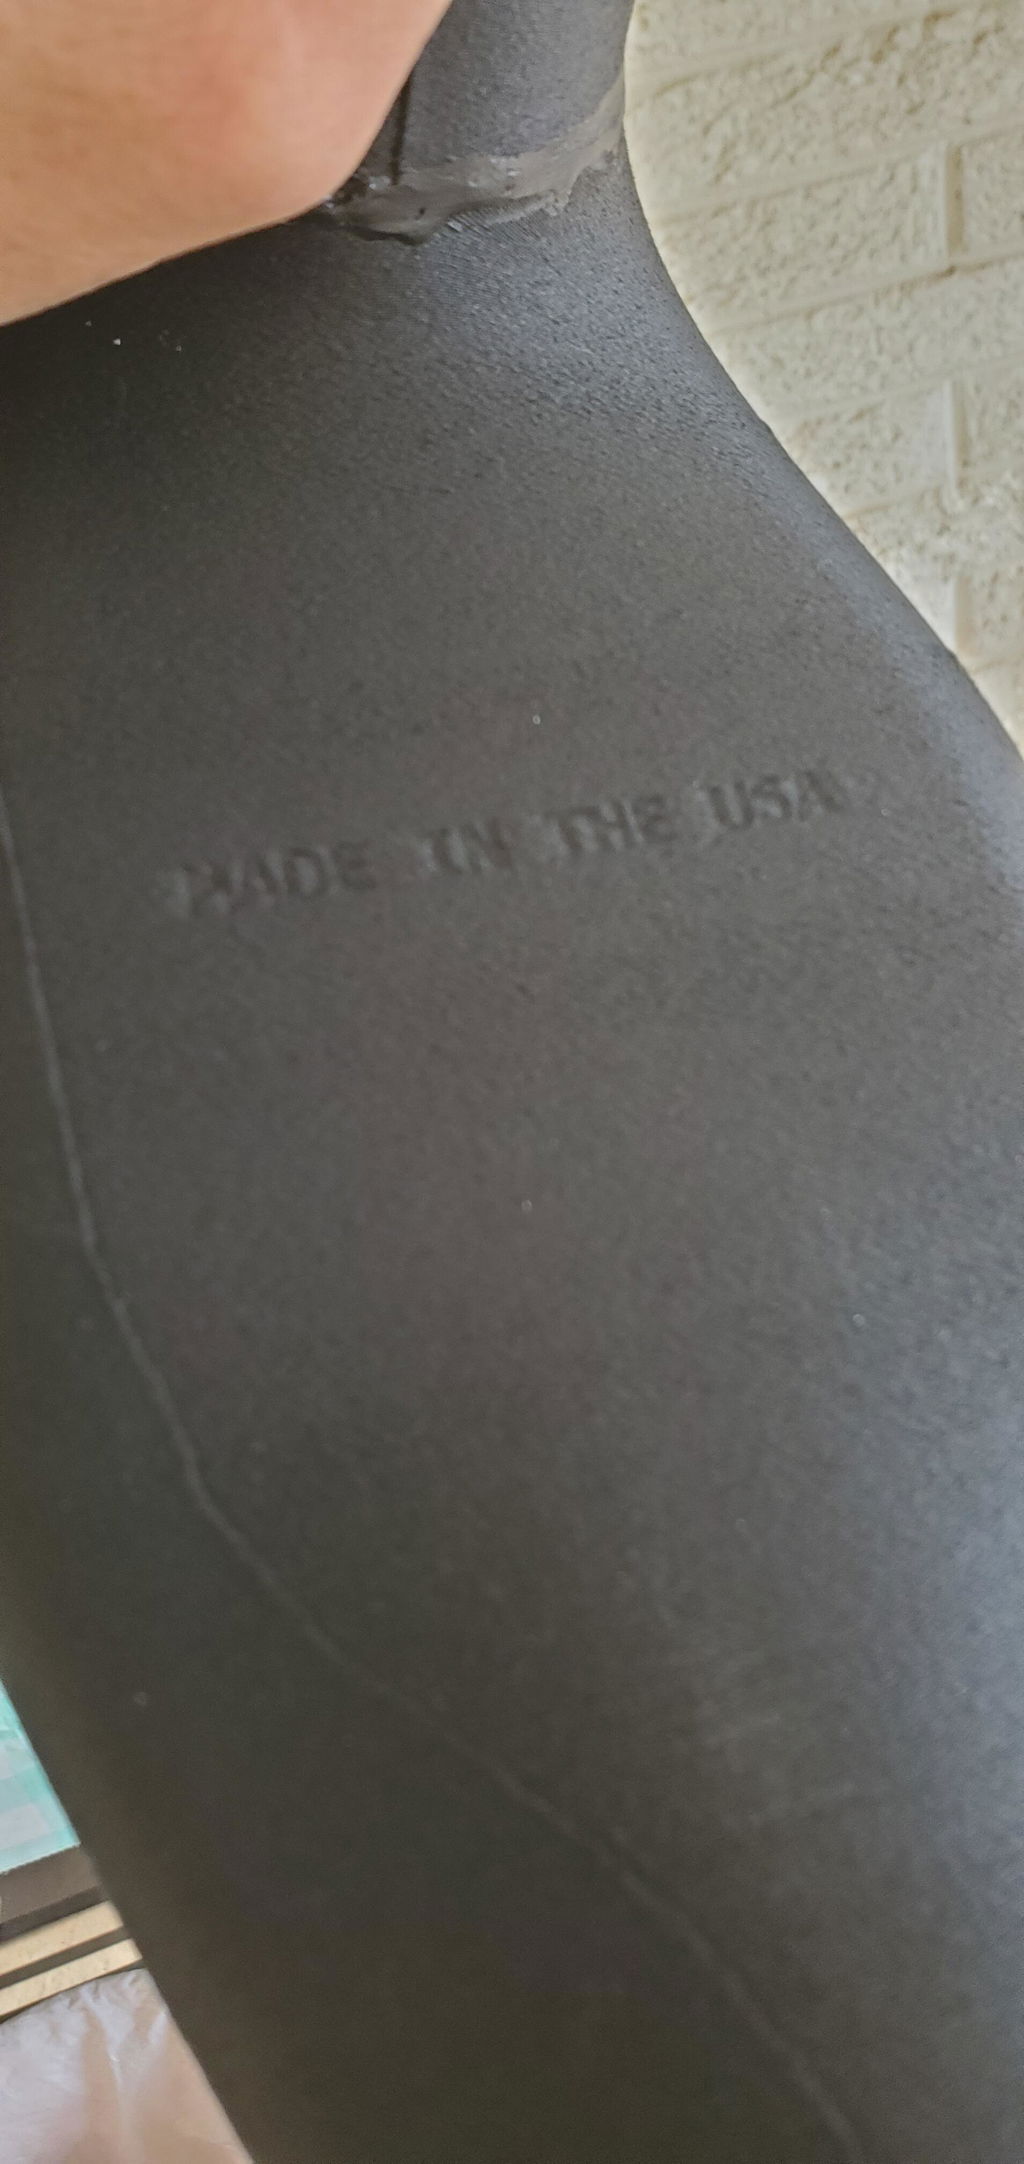
- Made in the USA
- Proper fitment within the engine bay. Hood closes no problem.
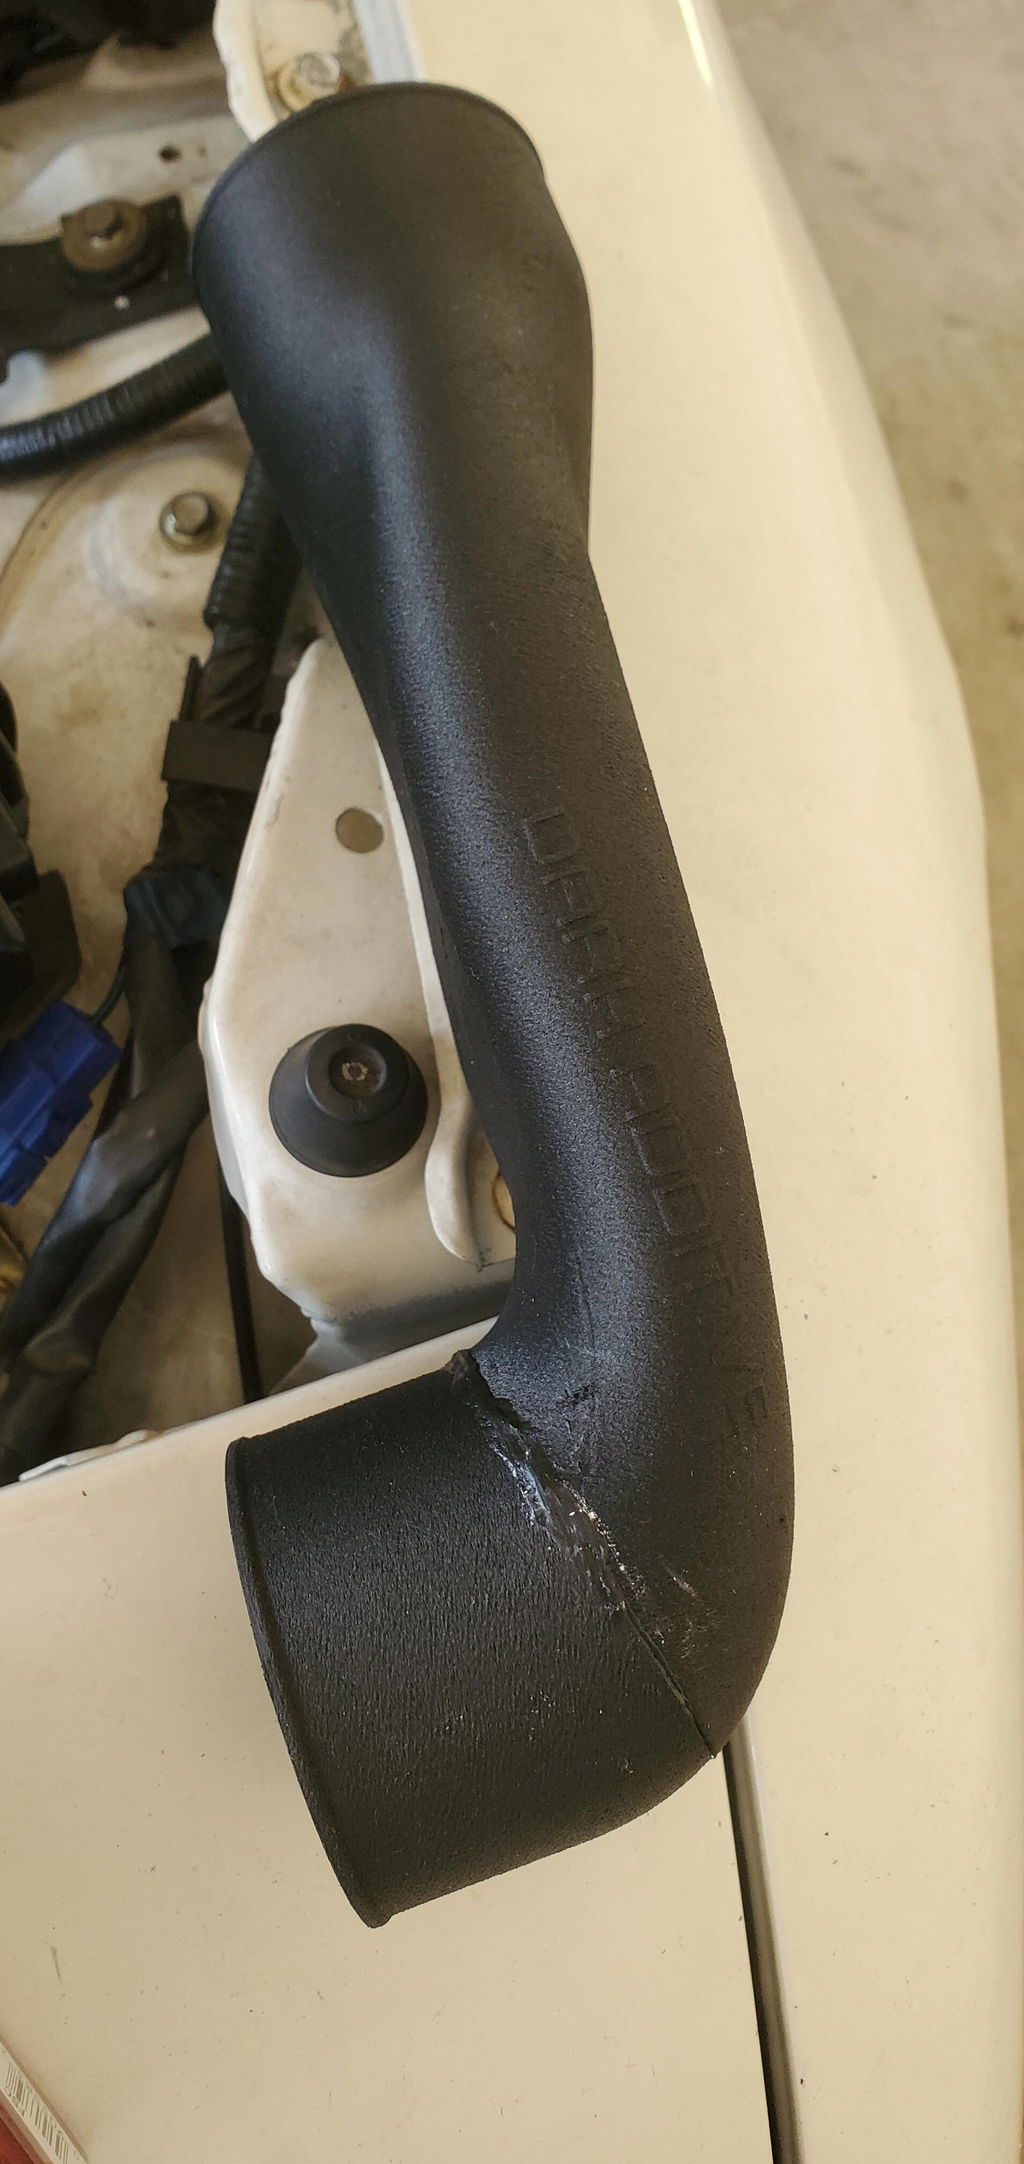
- Phenomenal surface finish
- The squished area maintains a cross sectional area equivalent to the inlet/outlet diameter
- Long Snout to the Air Filter for easier installation
-
Made from Carbon Fiber & PA6 Nylon from USA premium sourced materials
-
Lower your intake air temperatures consistently
-
Made for NA-Chassis Miata owners
- Supercharged NA-Miata Applications that have their S/C above the header supremely benefit from colder air temperature and can also easily utilize this
Important Notes:
The newly redesigned intake pipe is now offered in several different sizes. If you don't read this IMPORTANT NOTE and place an order for the wrong inlet pipe, you will be responsible for return shipping and re-stocking fee.
As of 2024, our Cobra intake tube is now a two part design which makes the intake stronger than the ones from previous versions. Both pieces are printed on the same and correct orientation (Z-axis) for maximum layer adhesion and strength. It is also made with ZERO Supports.
Sizes:
A. Inlet: 2.75" / Outlet: 2.5"
> Note: Great for Supercharged setups. No modification needed at the inlet hole and 2.5" is easier to fit with all the piping needed for S/C applications. Plenty of flow for S/C needs.
B. Inlet: 3.0" / Outlet: 2.5" (More Flow)
> Note: The hole that is in front of the radiator on most NA-Chassis Based Miata's is an elliptical 2.75" hole. You will need to widen this hole to make it 3.0" in diameter. If you don't have the hole, you can make one with a hole punch saw on a regular drill but please inspect the are underneath it. Mazda has been known to place a reservoir there in the past that may need to be relocated. Please be advised, this one is NOT Plug and Play, you will need to massage the hole to be slightly larger.
C. Inlet: 2.75" / Outlet: 2.75" (High Flow)
> Note: Fits without modification. This will have a larger outlet if you want the extra flow to your situation.
D. Inlet: 2.75" / Outlet: 3.0" (High Flow)
> Note: Good option that fits without modification but you don't want to use a step-down coupler on the outlet to your intake piping.
E. Inlet: 3.0" / Outlet: 3.0" (Max Flow)
> Note: This option has the Maximum allowable amount of flow. The hole that is in front of the radiator on most NA-Chassis Based Miata's is an elliptical 2.75" hole. You will need to widen this hole to make it 3.0" in diameter. If you don't have the hole, you can make one with a hole punch saw on a regular drill but please inspect the are underneath it. Mazda has been known to place a reservoir there in the past that may need to be relocated. Please be advised, this one is NOT Plug and Play, you will need to massage the hole to be slightly larger.
Q1: "What's included in the purchase?"
A: Just the intake pipe. You will need to connect the intake pipe to the engine. We don't really make a full kit because the necessary parts could be different from vehicle to vehicle, Engine build to engine build
Q2: "What do I need to install and use this intake pipe?
A: You're going to need a 90 degree coupler if you want to put your air filter horizontal in front of the radiator to avoid an intercooler, a 60 degree coupler or so, some clamps, a filter and some misc parts.
Q3: "Can't I just 3D Print my own? You're too expensive."
A: Correct. You can! Design it and print it yourself.
The original schematics from Alec Moody (Thingiverse) was designed only for the NA NON Turbo applications. Its orientation would never work on Force Induction setups. We have done all the hard work, R&D and redesign it to fit and work with nTurbo/Supercharged and K swapped Miatas.
Q4: "Did you do any airflow analysis?"
A: We have not gotten there yet. We do see plenty of good airflow, no restrictions reported from any of the tuners that have worked with this installed. The main take-away here is, REPEATABILITY. It's not just about how much more power but how consistently your motor can produce power. This intake pipe allows for air to get picked up in front of the radiator where the air is colder. That means your ECU will retard-timing far less so you make more repeatable power.
Q5: "Will this give me more power?"
A: Yes. If you lower your intake air temperatures, you will gain more power. Typically, upgraded intakes give you better piping and a filter and sound but they leave the air filter in the engine bay picking up plenty of heat in the process. This intake pipe eliminates that issue since it picks up cold air in front of the radiator. We had one customer who dropped over 60 degree's on their IAT's with this cold air intake. They were supercharged and had an air filter back by the firewall. Now with cold air in front of the radiator as a pickup, the difference was huge but this is unique situation.
Q6: "Will you lower the price in the future?"
A: No. A couple of times a year, we may offer a discount code and generous promotion sales normally during Black Friday and major US holidays. We will list it in plain sight at the top of the website during those times.
Q7: "Will this hit my hood?"
A: No. It's really tight! but it wont. As a matter a fact, in the instructions included, it's highly recommended you adjust your hood bump stop for clearance. If the hood closes too low, you will crack the pipe.
Q8: "Do you make something for the NB-chassis?"
A: Nope. Sorry. Maybe one day?
Q9: "Can I get your logo/name removed?"
A: No. We tried to keep the logo tight and out of the way. We think it's a fair compromise between my marketing needs and your engine bay aesthetics.
Q15: "Due to the placement of the filter in the front bumper, will I suck up any water?"
A: No. The filter is still high off the ground. Water can't fall on it from above and the water below doesn't have any way to kick up. We have made over 50+ of these and many of them on a daily driver without any issues.
Q16: "Is this 3D-Printed?"
A: Yes. We prefer it that way too. The original from a decade ago was designed for a molding process. I do feel that method is superior but it's a pain in the ass to make. That's why we kept the internal volume and structure the same since the airflow data was phenomenal but enhanced the outside so I could make it 3D Printed in a consistent, safe and pragmatic way. We have come a long way since that original one and now it's be redesigned completely for all the benefits without any negatives we can find.
Q18: "Will this melt or break apart?"
A: In the context of a car in operation, no, it will not melt. Typical engine bay temperatures are usually in the range of 205-250degF. The material this is made from has a threshold of about 325degF. On top of that, you always have air flowing through it since it carries air to the engine, always inherently keeping it cool at all times. Hundreds of hours on peoples cars daily driving and racing, no melting or breaking apart. I could have printed it in a subpar material like ABS/ASA but instead, I printed it with a higher grade material. Over 200grams of filament is needed for every single Cobra Intake Tube.
Q19: "This intake pipe is laying over the radiator, that means it's going to heat up the air anyways."
A: That's not the full story. When you have a pipe like this laying over the radiator. The thermodynamics would show it's difficult to get heat energy from the radiator to the intake pipe. Heat energy would have to go from aluminum to the air, then air to the plastic, then plastic to the air inside the intake pipe. When you have a lot of thermal transfers from one material to another, it's not very efficient. A real world example that shows this process would be a cold drink inside of a thermos. A good thermos will have a vacuum sealed buffer of space between your cold drink and the outside warm air. The thermos resists a lot of heat transfer. To make matters even more interesting, the pipe is made from carbon fiber nylon. Two materials that don't absorb heat like a metal and transfer. The air inside the pipe is always moving since your engine is always gulping down air. The air doesn't have enough time to sit around and absorb heat energy. Overall, we always see a decrease in IAT's in every application which is always going to yield back positive results.